|
|
|
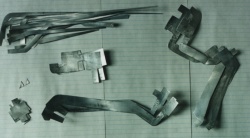
![]() Photo of 1 complete set of parts
Photo of 1 complete set of parts
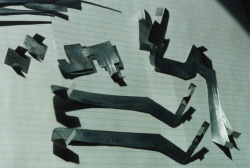 Begin by folding spark gap bases 90 degrees. Produce the holes for the pop rivets. Set
the pop rivets and thread them for the spark gap points. You may redesign these if you wish. The spark gap base may be cut as a
triangle instead of a square. The point of the triangle would become the point of the spark gap. Adjustments would then be made by
bending the point instead of adjusting the screw.
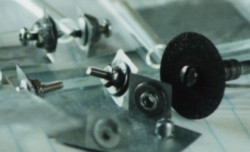
![]() The pop rivet is a 1/8" short aluminum rivet. Use a #4 stainless steel washer
as the pop rivet backing plate. Set the rivet using the drilling jig. Hold the washer tight to the rivet with a notched wood block while
setting the rivet. Cut off the back side of the pop rivet with the mototool. Leave about 1/16 of the rivet. The photo shows the part
of the rivet that was cut off. Do the island capacitor first. It is easier to replace when you find that the mototool has ripped it from
your fingers and smashed it into the ceiling. Wear eye protection. After tapping the rivet put a screw through it and then put a nut
on the screw. Glue the nut to the rivet on the side that was cut off. Use Goop sparingly to fill the gap between the nut and the
washer. Do not allow the glue to make a web to the capacitor plate.
The pop rivet is a 1/8" short aluminum rivet. Use a #4 stainless steel washer
as the pop rivet backing plate. Set the rivet using the drilling jig. Hold the washer tight to the rivet with a notched wood block while
setting the rivet. Cut off the back side of the pop rivet with the mototool. Leave about 1/16 of the rivet. The photo shows the part
of the rivet that was cut off. Do the island capacitor first. It is easier to replace when you find that the mototool has ripped it from
your fingers and smashed it into the ceiling. Wear eye protection. After tapping the rivet put a screw through it and then put a nut
on the screw. Glue the nut to the rivet on the side that was cut off. Use Goop sparingly to fill the gap between the nut and the
washer. Do not allow the glue to make a web to the capacitor plate.
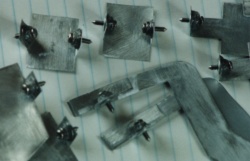 Completed spark gap points. Set the points at mid position before assembly. The spark
gap point screws are #2-56 x 3/8 stainless steel round heads. The tap is made from a #2-56 x ½ screw. The point is ground to a 45
degree angle.
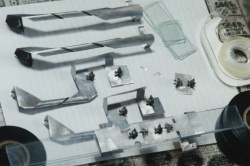
![]() Completed set of parts waiting for assembly. At this point you will feel
like each of these aluminum scraps is a valuable piece of jewelry because they are so difficult to produce. All pieces of glass are 1"
wide. Sand the edges with course sandpaper to remove sharp edges. Just a little bit of sanding will be enough.
Completed set of parts waiting for assembly. At this point you will feel
like each of these aluminum scraps is a valuable piece of jewelry because they are so difficult to produce. All pieces of glass are 1"
wide. Sand the edges with course sandpaper to remove sharp edges. Just a little bit of sanding will be enough.